Splitboarding 101: The Complete Beginner’s Guide
The Best Turns Are Earned
Whether you're just getting started with splitboarding or you're an experienced backcountry rider who just wants to brush up on some basics, you've come to the right place - Burton's Splitboarding 101. This guide outlines some splitboarding fundamentals, including key vocabulary terms, an overview of gear selection and setup, and some techniques to consider before heading out.
Remember, when it comes to splitboarding, you'll be spending 90% of your time hiking uphill, 5% of your time messing with gear, and 5% of your time riding downhill. Learn to embrace the uphill as part of the splitboarding experience, and you'll never have a bad day.
The Best Splitboarding Terrain
Inbounds Splitboarding
Inbounds splitboarding combines all the satisfaction of earning your turns with the conveniences of resort riding: hike uphill, rip some groomed runs, and then grab a snack and use the restrooms at the base area (COVID-19 depending of course). Increasing lift ticket prices and lighter/cheaper splitboarding gear has caused uphill inbounds traffic to surge in recent years, and in response to this uptick, resorts have mostly embraced the trend, implementing safety policies that include charging for uphill access, restricted uphill travel days/times, or designated uphill routes.
Pro tip: Always check the uphill policy of your destination before heading out for an inbounds splitboard adventure.

Backcountry Splitboarding
Splitboarding was born in the backcountry; and many riders seek the solitude and connection with the outdoors that only the backcountry can provide. Plus, it helps to get away from the lift lines, jeans-wearing skiers, and yellow jacket slow zones that are found on patrolled terrain. However, the backcountry is inherently risky and should only be explored by experienced and knowledgeable riders. If you plan to venture into the backcountry, please review Why You Should Take an Avalanche Safety Course and What to Expect, and find a course near you, to make sure you understand the associated dangers and how to mitigate them.
Splitboarding 101: Vocabulary
Like any community, splitboarding has some activity-specific lingo, and you don't want to get left out of the conversation. Here are some splitboarding terms that will keep you included in the conversation and should help you describe what you're doing on the hill.
Verbs You Should Know
Bootpacking: When the slope gets too steep to skin up, riders must remove their splitboards and hike uphill by kicking footholds into the side of the mountain and this is called bootpacking; these footholds resemble stair steps and allow riders to quickly gain elevation.
Sidehilling: The practice of moving across a hill, parallel to the horizon, where one splitboard ski is higher than the other and the edges are used to maintain grip.
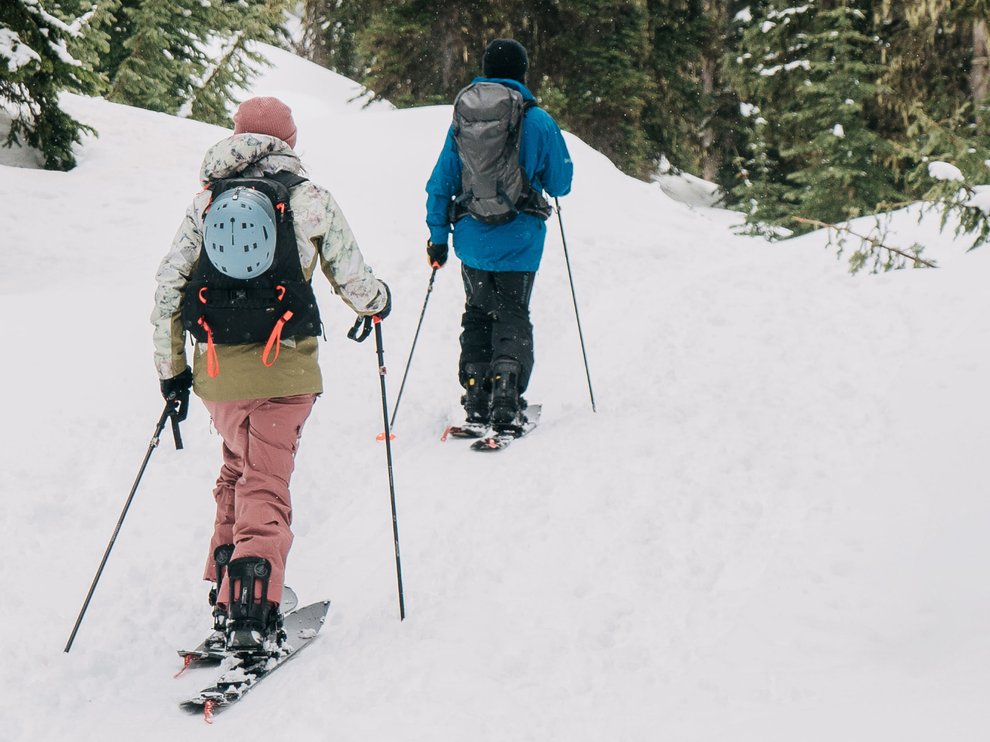
Touring: Touring is the entire act of backcountry splitboarding, including establishing a route, skinning uphill, and riding back downhill.
Nouns You Should Know
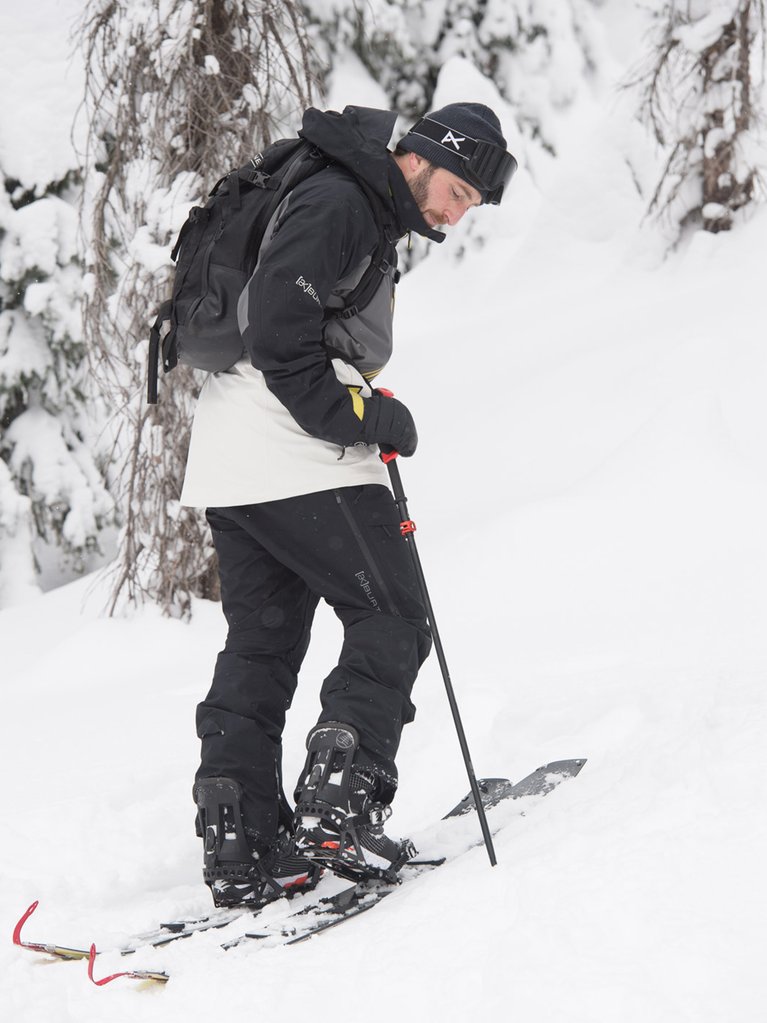
Climbing bars: Climbing bars are typically integrated into splitboard bindings and are used when ascending steep slopes. When engaged (flipped up), climbing bars reduce calf strain by raising the heel of the foot to be more level with the slope. Note: Most climbing bars come with two height options.
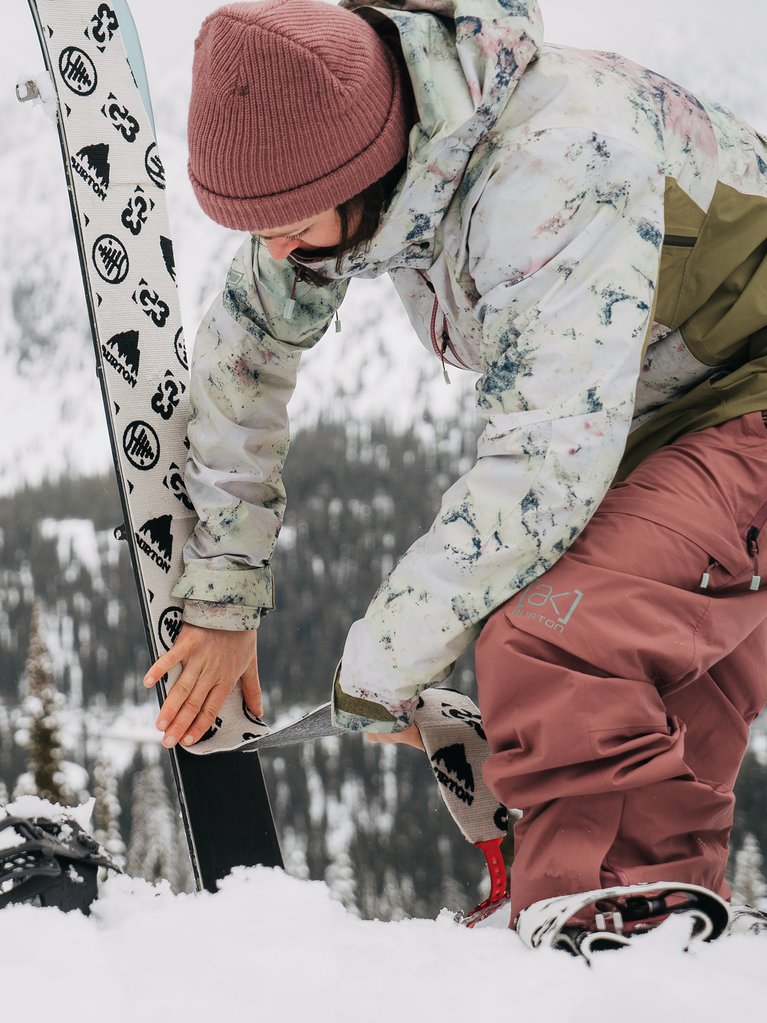
Climbing skins: Climbing skins (or just "skins") are strips of material made from a carpet-like plush that are used during uphill splitboarding to allow the individual split skis to glide forward while preventing them from slipping backward. Skins provide traction that allows riders to climb uphill with split skis on their feet, attaching to the bases of split skis with nose/tail clips and glue. Skins are removed at the top of the run and folded in half (to protect the glue) before being stowed for the ride back down.
Crampons: Splitboard crampons are essentially metal spikes that mount to the underside of splitboard bindings and provide additional uphill traction in icy conditions or steep ascents.
Puck system: A puck system allows snowboard bindings to be used for splitboarding, both in touring mode and downhill mode. Splitboard-specific bindings will integrate directly with puck systems, while regular snowboard bindings require an additional rail.
Skin track: A skin track is the uphill path that has been established (either by your group or another group). Setting a skin track is both an art and a science, at all times trying to balance safety with efficiency.
Splitboard: A splitboard is a snowboard that has been split in half down the middle (lengthwise) so that each half can be used independently like a ski to tour uphill. A factory splitboard will have metal edges on all sides to improve edge hold while touring and integrated climbing skin attachments.
Splitboard bindings: Almost any snowboard bindings can be used as splitboard bindings with the proper puck system and adapter kit. However, splitboard-specific bindings (like the Burton Hitchhiker) will usually be much lighter in weight and offer direct puck system integration, quick-release mounting systems, and climbing bars.
Split hooks: Split hooks are designed to hold the two halves of a splitboard together and provide torsional strength (stiffness across the width of the board).
Tip clips: Tip clips are found on the nose and tail of the splitboard and allow the two halves of the board to be "locked" together for downhill mode.
Transition: Transitions are the change from walk/tour mode to downhill mode (putting the splitboard halves together, remounting bindings, collapsing poles, and getting packed up to ride) and vice versa.
Splitboarding 101: Gear
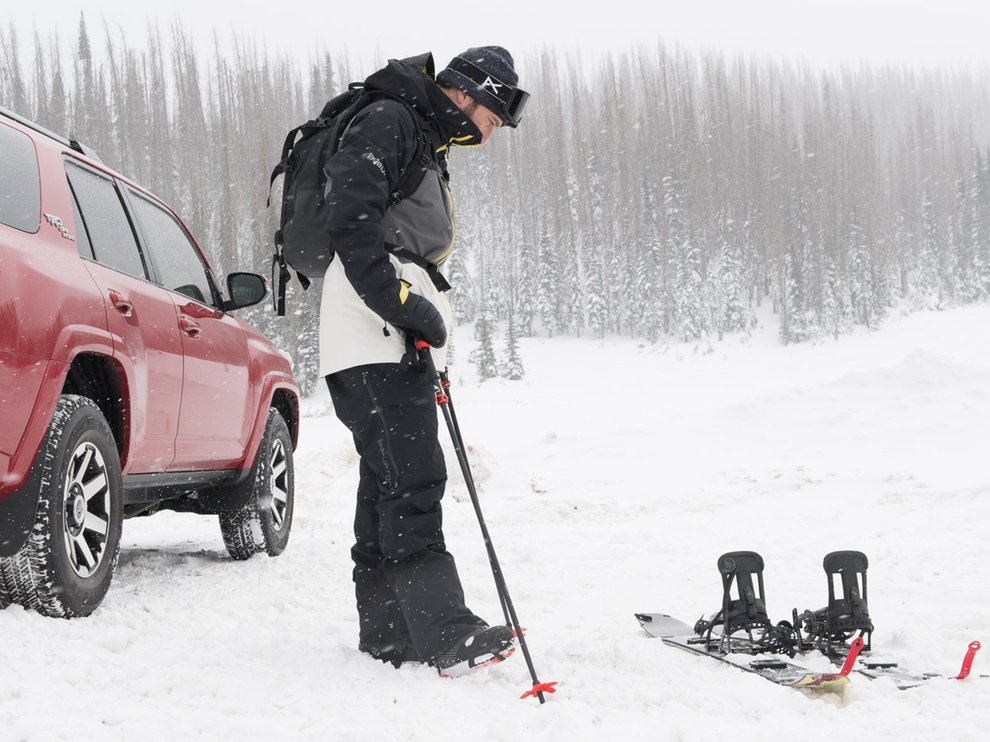
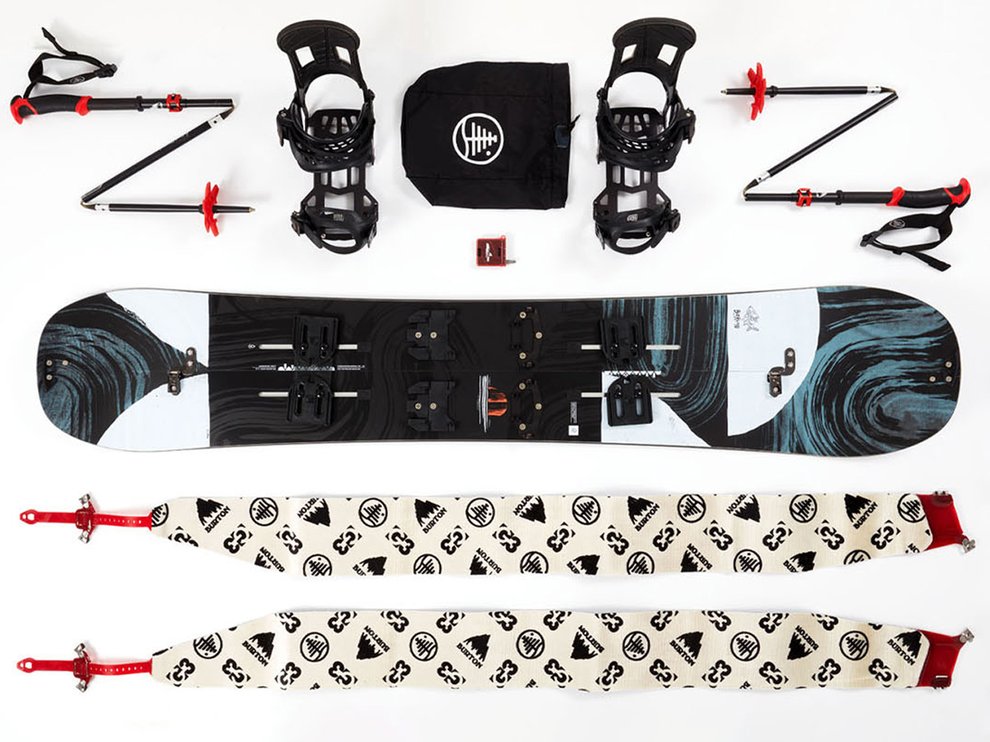
Getting started with splitboarding requires an investment in some specific equipment. At a minimum, we recommend the following gear:
- Factory splitboard: While making your own splitboard can be a fun project, it simply won't provide the same level of performance (or fun). Size your splitboard similar to the board you like to ride inbounds, taking into account weight, riding style, and terrain.
- Splitboard bindings: Split-specific bindings typically weigh less and are more intuitive to use. Another option is to use a pair of regular snowboard bindings with the appropriate split adapter set (pucks and slides).
- Binding mount system: Generally, a puck system will provide the most flexibility for mounting bindings, but there are other options available.
- Splitboard boots: Most snowboard boots can be used as splitboarding boots, but make sure that they provide enough support for the climb without any chafing.
- Touring skins. Required for the ascent, touring skins can be purchased pre-cut for a specific board model or in a universal size that must be trimmed to fit.
- Collapsible poles: Poles are important to touring, providing additional balance and power for the uphill climb. Look for poles that collapse down small enough to fit into your backpack for the ride down (like the Burton x Black Diamond Compactor Poles).
- A comfortable and reliable backpack: You'll carry all your gear for the day in your backpack, make sure it fits well and provides enough space for water, snacks, layers, and the rest of the 10 Essentials.
The good news? If you're getting into splitboarding after resort riding, you should have everything else you need in your gear closet already. When you head out touring, you'll want the proper base layers and outerwear for the conditions, a helmet and goggles, and the desire to get after it.
Splitboarding 101: Technique
There are many nuances to splitboarding that can only be learned through experience, but we've put together a few techniques that all splitboarders should follow.
Pre-Tour Technique
Practice your transitions. Don't be the jerry who makes everyone wait because it's the first time you've ever tried your new splitboard gear. Put your skins on; take them off. Put your splitboard bindings on; take them off. Make sure you understand how the tip clips work and the collapsible poles collapse. Remember that you may need to perform all of these tasks with your gloves on while perched on a mountaintop somewhere.
Put your skins on at home, before you leave. Putting your skins on your split skis at home serves two important purposes: you won't forget them and you'll be ready to go as soon as you hit the parking lot.
Uphill Technique
Find a rhythm. Don't push yourself too hard (the first person to throw up during the climb has to buy the first round) and focus on your breathing.
Maintain good posture. When touring, avoid digging in and placing too much weight over your poles. Stand up straight with your head and shoulders centered over your body; this will help you avoid fatigue.
Practice good skin track etiquette in the backcountry. Don't bootpack in the skin track. Get off the skin track for bathroom breaks. Don't blast tunes on the skin track (if music helps you find your rhythm consider one earbud in and one out to stay aware of your surroundings). Allow faster uphill travelers to play through. And always space out the members of your group on the skin track.
Select low-angle approaches. Even if it means a longer distance, the lower angle approach will almost always be safer and more efficient. While short and steep may be quicker, you will definitely expend more energy that could be used for the ride down.
Downhill Technique
Don't be afraid to dig in on your edges. Remember, a splitboard is actually two smaller snowboards that are locked together with bindings; it will ride differently. The torsional flex will be very different than a regular snowboard and you may need to hammer on your edges for them to hold. Start slow and work up to speed.
Post-Tour Technique
Take care of your skins. Experienced riders can get 5+ seasons on a pair of skins; beginners who fail to properly maintain their skins are lucky to get one full season on them. Allow your skins to dry completely before putting them away and only use the cheat sheets for seasonal storage.

General Splitboarding Tips & Tricks
Trim your skins away from the dog. If you purchased trim-to-fit skins and need to cut them down to the correct size, make sure to perform this work outside or somewhere else where you won't get dog hair in the glue. We learned this the hard way.
Pack a few extra screws. With so many components on a complete splitboard setup, it's important to have backup spare parts in case you lose something and need to perform emergency rig surgery.
Make sure everything fits into your pack. External gear can snag on trees and bushes on the uphill and the uneven swing weight can throw off your balance on the downhill. Having a hard time fitting everything into your pack? Upgrade to something bigger or cut down on the gear you want to take.

Splitboarding 101 Graduation
Now that you know the basics it's time to get out and splitboard. Remember, every expert splitboarder was once a beginner. You'll probably fall a few times and maybe you'll get a few bruises (including your ego), but at the end of the day you'll have the satisfaction of earning every single turn.